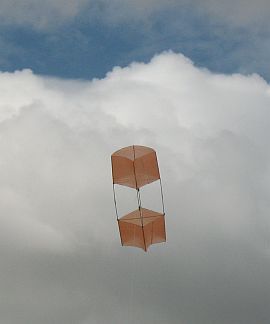
The MBK 2-Skewer Box
This set of instructions on how to build a box kite assumes you know absolutely nothing about kite making. You might already have some of the simple tools and materials required. Anything you don't have is easily bought. If not exactly what I used, then at least something pretty similar!
The instructions on how to build a box kite might look awfully long, but each step is quite simple to do. Just quickly work your way through, skimming over any detail that you don't need. All in all, it should be quite hard to make a mistake!
If made from 30cm (12") skewers, the MBK 2-Skewer Box Kite is not huge at 58 cm (23") long, with cell panels measuring about 17cm x 20cm (7" x 8"). This box design is a moderate to fresh wind flier, and requires no tail. Unless you are flying in a storm which is not recommended anyway! If accurately made, this kite can cope with quite strong wind.
 The has this design and many others in bamboo skewers and plastic.
A handy approach is to just print out the pages for the kite you want to make next. The e-book is also handy for working off-line on a laptop or tablet.
How To Build A Box Kite
Main Spars
- Snip the point off a skewer. To 29cm for a 30cm skewer, or 11 1/2" for a 12" skewer. This will be '1 skewer length' (1.0SL) for your kite.
- Snip the points off 7 more skewers, to exactly the same length as the first one. These 8 skewers will form 4 main 'spars'.
- From a spare skewer, snip off 8 lengths, each just 0.1SL (2.9cm, 1 1/8") long. These are the reinforcers which will connect the spar skewers together.
- Lay down the 8 spar skewers, together with the 8 reinforcers, and lay wood glue down the joins. See the photo.
- Get down low and look along each spar in turn. Carefully move them as necessary to get each spar as straight as possible, before the glue dries.
 How To Build A Box Kite
Cross-Pieces
- Take 2 more skewers, and trim each one to a length of 0.98SL (28.4cm, 11 1/4"). These are 2 of the 'cross-pieces' - 2 more will be needed later, but don't make them now.
- From a spare skewer, snip off 8 lengths, each just 0.05SL (1.5cm, 5/8") long. These will secure the cross-pieces to the main spars.
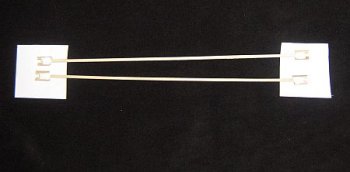
- Arrange these to make 2 cross-pieces, as in the photo. Lay down wood glue over every join.
How To Build A Box Kite
Sail
 The template down there represents one cell of the kite, laid out flat. Now transfer the measurements to the sail plastic as follows...
- Firstly, take a light, single-ply plastic bag and lay it flat on the table. I use cheap orange garden-bag plastic. The more expensive bags are usually 2 or 3-ply plastic, which is heavier and less see-through.
- Measure and mark the rectangle outline first, with a black marking pen and ruler. Do this near the side crease of the bag, as in the top photo.
- Now measure and mark the fold lines.
- Flip the bag over and trace over all the lines.
- Cut out the plastic containing the 2 rectangles and open it out, as in the bottom photo.
- Cut around the 2 rectangular outlines with scissors, one at a time. You'll be sorry if you attempt to cut both thicknesses of plastic at once, since the bottom one will tend to slip out of position!
- Arrange the 4 bamboo spars over the plastic as in the photo, covering up the drawn fold-lines.
- Tack down all 8 corners of the sails to the floor or table top with small pieces of sticky tape. This stops unintended shifting of the plastic while you are trying to...
- Lay down 4 long lengths of clear sticky tape, securing the spars to the plastic. The tape is visible in the photo - look for where the plastic is smoother and slightly darker, near the edges.
- Remove everything from the table top, either pulling off or trimming away the small square bits of tape at the corners.
- Fold the sails, bringing the short edges together and sticking them with tape as shown in the photo.
- Now open the box kite out, and carefully lay down tape along the inside edges as well, to make the 2 joins even more secure. A bit tricky, take your time!
- This VPK (Video Platform Kite) is, I suspect, a bit of a giggle now, to some who visit here or subscribe to the newsletter. I've been trotting out rather minimal amounts of information about the proje…
YOU MIGHT ALSO LIKE

