 Few things in life are better on a brisk, sunny spring day than taking the family out to the park to fly a kite. But have you ever thought about making your own? With the help of the whole family, and a few simple household materials, it’s not as complicated a feat as you might think. Here’s how.
1. Get your supplies
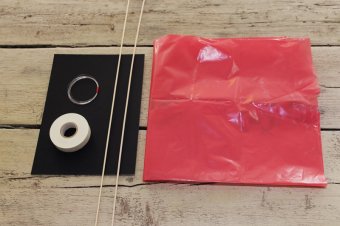
To make your own homemade kite, you’ll need:
- A heavy-duty plastic bag, such as the kind designed for garden rubbish.
- A roll of electrical tape. Pick a colour that goes well with your bag!
- Two lengths of thin hardwood dowel, at least as long as your plastic bag. Aim for around 5mm in diameter. These can be found in most DIY shops.
- A line. A roll of fine nylon knitting yarn will do the job here, or some other light but strong synthetic thread, such as a fishing line.
- A piece of wood or cardboard for the winder. (You can also buy line and a plastic winder online for a few pounds from specialist kite shops).
2. Gather your tools
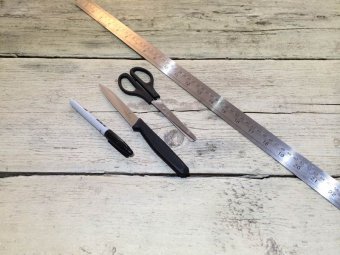
The basic tools in an amateur kite-maker’s armoury can all be found at home or in the shed. Just remember to always keep the sharp stuff away from the kids. You’ll want:
- A ruler
- Scissors (to be used by adults only)
- A black marker pen
- A small wood saw or a carving knife (also to be used by adults only)
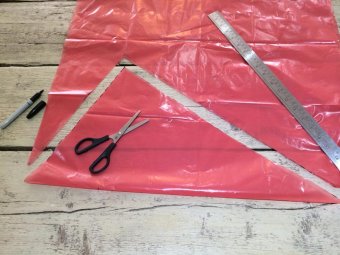
 3. Sketch your kite sail
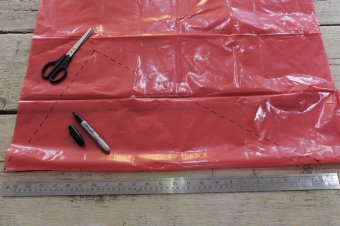
Lay your plastic bag smoothly down on a flat surface, in ‘portrait’ orientation, with the opening at the bottom. Mark three dots on the bag: one in the very top-left corner (closed end), a second on the left edge 100cm down from the first dot, and a third 25cm down from the top and 50cm in from the left edge.
Using the ruler, draw a straight line from dot one across to dot three, then back down and across to dot two. The dots should form an uneven triangle.
Flip the bag over, and on the reverse side trace over the original pen line to make a matching triangle shape. Carefully cut along the top and left hand edge of the bag. Open it out to a form a large flat sheet which – hopefully! – will now have a recognisable diamond kite shape marked out.
4. Cut out your kite sail
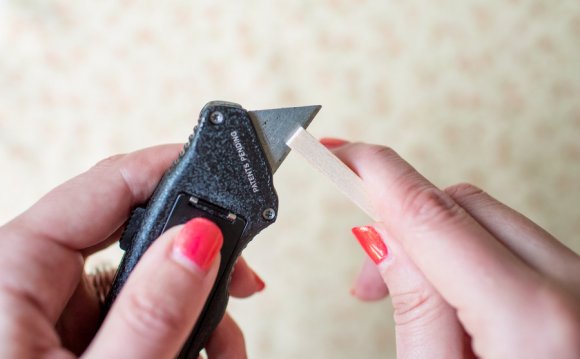
Grown-ups only: Take the scissors and carefully cut out your diamond. Don’t throw away the scrap pieces of plastic bag!
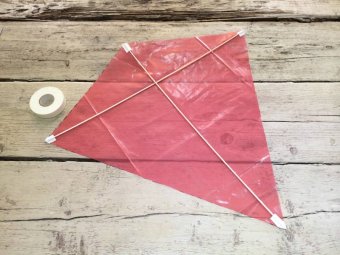
 5. Build your kite structure
Take a length of dowel and lay it down the centre of your kite shape, from the top of the diamond to the bottom. Grown-ups only: Saw it so it is exactly the length of the kite. Cut a roughly 5cm piece of tape to affix each end of the dowel to the plastic. Tape along the length of the wood and fold the tape over a little at the top and bottom to firmly secure it.
Take a second piece of the dowel and lay it from the left to right corners of the kite shape, to form a ‘t’ with the first piece. Saw and tape exactly as you did before.
6. Attach your line
Grown-ups only: Turn the kite over and, using the end of the scissors, poke a small hole in the plastic where the two dowels cross. Thread one end of your line through the hole and firmly tie it to both pieces of wood, add some tape to the middle over the knot to make sure it is firmly in place.
Tie the other end of the line to a small wooden block or piece of board that you can hold comfortably.
Grown-ups only: To make this handle, a strip of cardboard long enough to hold with both hands and slice a slit in the middle on both sides. Stick the end of the thread in one of the slits so that it doesn’t move as you wind the thread around.
7. Make a tail
From the remaining pieces of plastic bag, fashion a long, narrow tail for your kite. The tail should be around 5cm wide and about twice as long as your kite.
You might need to tape pieces together and may need to use a second bag if you don’t have enough left over. Tie the tail to the bottom of the longer length of dowel, just above where it is taped to the plastic.
8. Fly your kite!
Wait for a windy day (when the leaves are rustling in the trees, not when it’s blowing a gale!) and then take your new kite out for a spin. A smaller, lighter version can be made using the same technique, but with a kitchen bin liner instead of a garden waste sack, and 30cm bamboo barbecue skewers instead of dowel. Happy flying!
YOU MIGHT ALSO LIKE

Share this Post
latest post
-
 Kite Festival Houston August 5, 2018
 -
Kite Festival Houston August 5, 2018
-
 Kite birds California August 5, 2018
 -
 Afghanistan Kite running August 2, 2018
 -
 Kite flying Lessons July 30, 2018
 -
 Bali Kite Festival July 27, 2018
 -
 Rosebud Kite Festival July 24, 2018
 -
-
 Southsea Kite Festival July 18, 2018