
The MBK 1-Skewer Diamond
This set of instructions on how to make a Diamond kite assumes you know absolutely nothing about kite making. You might already have some of the simple tools and materials required.
Anything you don't have is easily bought. If not exactly what I used, then at least something pretty similar!
These instructions on how to make a Diamond kite might look a bit long, but each step is quite simple to do. Just steadily work your way through from top to bottom, skimming over any detail that you don't need.
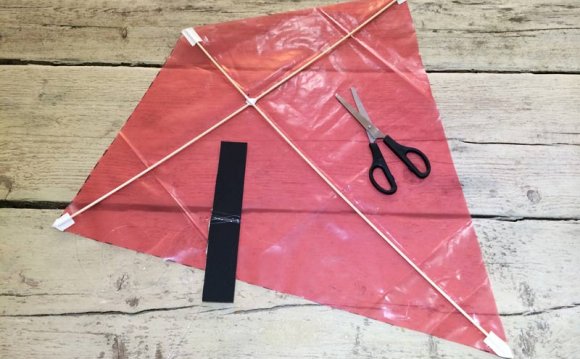
At 29cm (11 1/2") tall, the MBK 1-Skewer Diamond Kite is a rather small Diamond, with dihedral and simple 1-leg bridle. With a long enough tail, it is equally at home in light or moderate strength winds.
As a bonus, these instructions also show you how to string several of these 1-Skewer kites together in a kite train!
 There's a 2-kite train up there in the photo. This design is so cheap and easy, why not try an even longer train. Imagine 10 or more, all flying on the one line!
1-Skewer kites are fun, but somewhat toy-like :-) due to their rather small size. Fancy something much bigger to fly, suitable for teenagers and adults?
The has plenty of 58cm (23") designs in bamboo skewers and plastic. These are 2-Skewer kites, but all the 1-Skewer designs are in there as well.
A handy approach is to just print out the pages for the kite you want to make next. The e-book is also handy for working off-line on a laptop, tablet or other device.
How To Make A Diamond Kite
Sail
Now's the time to read up on the required for making a Skewer kite, if you haven't already.
The template shown above represents one side of the kite sail. You will now transfer these measurements to the sail plastic as follows...
- Firstly, take a light plastic bag that will fit the entire Template shape within one side, and lay it flat on the floor.
- Mark dots on the plastic, corresponding to the corners of the Template. There is no need to use a T-square, since any small error will be duplicated on the other side of the sail.
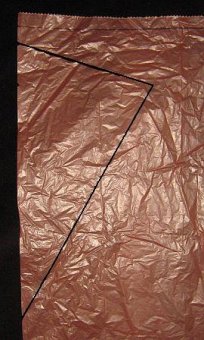
- Using the marking pen, rule lines between the dots, as in the photo.
- Flip the plastic bag over, and trace over all the black lines using your marker pen and ruler.
- Cut out a rectangular section of the bag containing the kite sail, open it out and lay it flat on the floor - you can now see the complete sail outline, as in the photo.
- Cut along the black lines with scissors, to create the sail.
- This VPK (Video Platform Kite) is, I suspect, a bit of a giggle now, to some who visit here or subscribe to the newsletter. I've been trotting out rather minimal amounts of information about the proje…
YOU MIGHT ALSO LIKE


