For The 2-Skewer And Dowel Kites
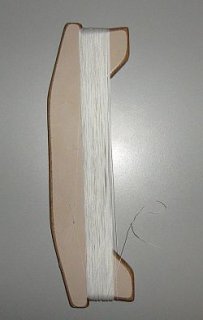
For some time we've been using simple 30 cm (12 inch) long kite winders for most of our flying. That size has proved just right for storing 150 meters (500 feet) of flying line.
The legal altitude limit in Europe is 150 meters, 80 in the U.K. (poor beggars). In the U.S. it's 500 feet, while in Australia it's 100 meters (300 feet) above the ground. We still use the 50 meter line for the 1-Skewer kites and occasionally for test-flying a new 2-Skewer kite.
Here's a refinement of our current 150 meter winder, in 2 versions. Can I be a bit pompous and call it the MBK150 Kite Winder... It will just make things easier later on if we have a number of these things lying around.
Firstly, for those in a real hurry, I will describe how to bang out a crudely finished winder that holds the same amount of line and has a similar ability to let out line continuously. To give it a name, let's call it the Quick Winder.
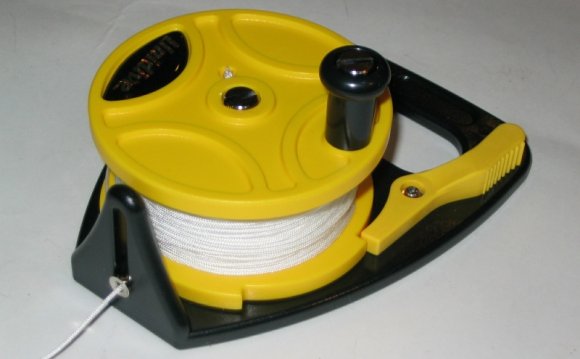
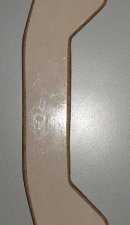
Secondly, I go on to describe extra steps to turn the quick winder into something much nicer to handle and use. It looks a darn sight better too! This one can be called the Nice Winder. There's a picture of it up there.
Now, I'm not an experienced wood-worker, so feel free to do the finishing work your own way if you can do a better job!
This 50-lb. Braided Dacron line from Amazon is a good deal, if you need line for your winder. Or perhaps three or four winders! Just use the search box if you need different strength line.Rather than bore you with a bunch of long paragraphs, here's 3 lists that describe this kite string winder.
 Features
- designed for 150 meters of 20 to 50 pound line with room to spare - it would also suit 50 meters of 100 to 200 pound line
- saw cut angle is designed to help line stay in place for storage, yet slip off easily when letting out line quickly in fresh wind
- cut-out takes some of the weight out of it, for extra comfort
- cut-out doubles as a finger-grip when most of the line is out
- sturdy to tolerate a fair amount of line stored under tension
- most of the work is done with saw-cuts, leaving a minimum of filing and sanding
Materials
- hardwood or heavy chip-board plank around 1.5 cm (3/4 inch) thick and at least 30 cm (12 inches) long and 9 cm (3 3/8 inches) wide
- for the Nice Winder, some dark wood stain (optional) and wood lacquer
Tools Required
- pencil or marking pen, and ruler
- medium grade work-working file
- a wood saw - a full size one is fine
- for the Nice Winder, a sheet each of 'very coarse', 'medium' and 'fine' sand paper (or 'glass paper' as it is now)
- also for the Nice Winder, a brush for applying lacquer - although you could use a piece of rag
Making The Quick Kite Winder
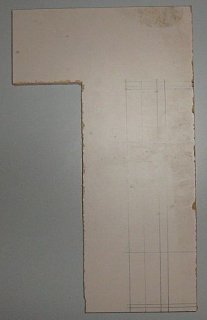
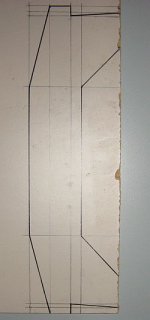
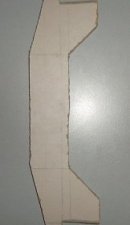
Referring to the plan, mark dots on the board, representing all the corners of the winder. Then rule straight lines between them as in the photo.
Now draw in the outline of the winder. I've used a black marking pen just so it shows up better in the photo.
Cut along all the lines with the wood saw.
Using the file, round off the 4 edges that will come into contact with the flying line when it's wound on. Take plenty of wood off so the line doesn't have to go around any sharp bends.
That's it for the Quick version. If that's all you want to do, skip straight down to the section titled The Flying Line. Otherwise...
Making The NICE Kite Winder!
Round all the edges with the file, for handling comfort.
Go over all of the winder with the coarse sheet of sandpaper, to take out any file marks..
Go over it all again, with the medium sandpaper.
I used a piece of heavy chip-board, which had plastic veneer bonded to each side - so I skipped the dark wood stain! If you are using wood, use the wood stain on it now.
 After the stain is dry, apply a coat of wood lacquer, and allow to dry completely. I used a polyurethane gloss product, which is supposed to be pretty hard-wearing.
Sand all over, lightly, with the light sandpaper.
Apply another coat of lacquer and allow to dry.
That's it, the finished article!
The Flying Line
Just like we did with the 50 meter winder, the line is designed to be easily taken off the winder if necessary, and attached to something else. For example, another kite, as part of a 'kite train'.
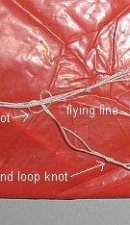
Put a large double overhand loop into one end of 150 meters (500 feet) of flying line. See the photo on the left. 20 pound Nylon or Dacron is ideal for our 2-Skewer kites, while 50 pound line is safer for the Dowel kites.
Loop the line over one horn of the winder, as in the photo on the right, and wind on all the remaining line.
Put a double overhand loop into the free end of the line.
Have you ever wondered just how much line has been let out?
Here's a tip! Before winding 150 meters of new 50 pound braided Dacron onto its winder, I measured it out in 30 meter (very close to 100 feet) lengths on the back lawn.
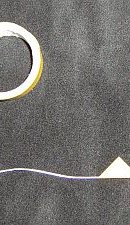
I then tagged the line every 30 meters with a small square of colored electrical insulation tape, as shown in the photo. Placed diagonally, then folded over and pressed together to form a triangle.
Here's the color sequence, measured from the kite end...
- 0 meters (0 feet): full kite winder
- 30 meters (100 feet): white tag
- 60 meters (200 feet): yellow tag
- 90 meters (300 feet): blue tag
- 120 meters (400 feet): black tag
- 150 meters (500 feet): empty kite winder, leave 3 or 4 turns on!
Of course, the black tag is the first to go on, when making up the line onto the kite winder.
To make the lengths easier to remember, the colors get darker with every 30 meters. I suppose you could mark the lengths on the tags themselves if you really wanted to!
So, if the kite is directly overhead in a thermal, you have a good idea how close you are to the legal limit. Black tag marks the limit in Australia, empty winder elsewhere in the world, basically.
At The Kite End...
The photo shows the line attached to the keel of a kite, using a Lark's Head knot. The knot is left loose to illustrate how it's done. Can you guess which kite it is?
The Kite Winder In Action
That's a handkerchief-sized rag being dragged along a pathway, as I wind on line as fast as I can. Just to give you an idea of the winding speed. It's handy to be able to get line in quickly sometimes. Example - the kite's down, some distance away, and it's starting to rain!
Not all flat winders are great for letting out line quickly, but I put some thought into getting this winder to do just that.
The second video... Rapidly moving further away on the end of this line was the 2-Skewer Barn Door kite, up at around 50 meters (160 feet) in a stiff breeze. Watch that line fly off, loop by loop!
This 50-lb. Braided Dacron line from Amazon is a bit heavy for my small Skewer kites, but ideal for kites which span at least 1.2 meters (4 feet) from tip to tip.- This VPK (Video Platform Kite) is, I suspect, a bit of a giggle now, to some who visit here or subscribe to the newsletter. I've been trotting out rather minimal amounts of information about the proje…
YOU MIGHT ALSO LIKE


