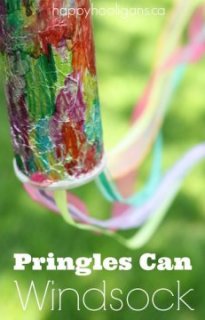
 A Pringles Can Windsock is a super spring craft for toddlers and preschoolers! It’s quick and easy, and requires just a few basic supplies that you may already have on hand!
The hooligans and I love making outdoor ornaments & homemade wind chimes for our backyard play space. The tree beside our playhouse is home to 2 sets of wind chimes, a homemade bird feeder, and now this colourful windsock! All of these ornaments are made from recycled or found materials along with a few odds and ends from our craft room. I love it! Not only are the hooligans decorating their outdoor play space with their own projects, they’re learning the importance of recycling and upcycling, and how fun it is to turn trash into treasures!
You’re going to love how short and sweet this supply list is!
To make our Pringles can windsock, you’ll need:
For your convenience, this post contains affiliate links.
 How to make a windsock from a Pringles can:
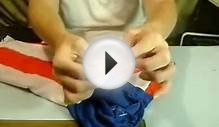
- Wrapping your Pringles can in a piece of foil: Take the lid off the can and line up the open of the can with edge of the foil so there’s no over-hang. Roll it up.
- Scrunch/compress any excess foil at the other end of the can, pressing it flat to the bottom of the tin.
- With your hand, quickly smooth the foil on the sides of the can. Don’t worry about wrinkles. They’re fine.
- You might need to run a bit of glue along the lengthwise seam to seal it if it gapes at all.
- Have your child colour the foil with the Sharpies. Completely cover the foil in a multitude of colours.
How to create a tie-dye effect with Sharpies and rubbing alcohol:
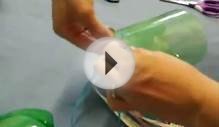
To get this marbled tie-dye effect on your aluminum foil, you need to drip a little rubbing alcohol on your coloured foil:
 Dip a craft stick or the handle of a paintbrush (or something similar) into the rubbing alcohol and tap a couple of drops on the can. You don’t want the alcohol it to run down the side of the can, because it will take your colour with it. You just want it to puddle and evaporate. You may have to twist the can a bit to counter any running should it occur.
When the alcohol evaporates, repeat the process with a couple more drops of alcohol, and keep repeating until all of the colours are blended.
Attaching ribbons to your windsock:
I LOVE how easy this process is!
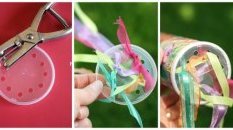
- Punch several holes around the edge of the Pringles lid.
- Cut several long lengths of ribbon in various colours and sizes.
- Thread the ribbons up through the holes in the lid and knot them together on the “inside” of the lid to secure them in place.
- Pop the lid back on the can.
To finish, poke a couple of holes near the top of the windsock, and thread some yarn through for hanging.
Voila! Instant Windsock! Wasn’t that easy?
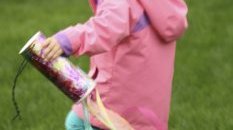
We couldn’t wait to see ours in action, so we quickly took it out to the tree beside our playhouse, and hung it on a low branch, where the girls had fun swatting at the ribbons.
Isn’t it beautiful! I just love how those ribbons dance in the wind!


YOU MIGHT ALSO LIKE

Share this Post
latest post
-
 Kite Festival Houston August 5, 2018
 -
Kite Festival Houston August 5, 2018
-
 Kite birds California August 5, 2018
 -
 Afghanistan Kite running August 2, 2018
 -
 Kite flying Lessons July 30, 2018
 -
 Bali Kite Festival July 27, 2018
 -
 Rosebud Kite Festival July 24, 2018
 -
-
 Southsea Kite Festival July 18, 2018